> ## Documentation Index
> Fetch the complete documentation index at: https://docs.trunk.io/llms.txt
> Use this file to discover all available pages before exploring further.
# Jira integration
> Triage your flaky tests faster by creating automatically assigned and labeled tickets with the Jira integration
When Trunk Flaky Tests [detects a flaky test](../../detection/index), you can create an automatically generated Jira ticket for your team to pick up and fix the test.
Webhook payloads will also contain ticket information when a Jira ticket is created with the integration or when [existing tickets are linked](./jira-integration#link-existing-tickets-to-tests).
## Connecting to Jira
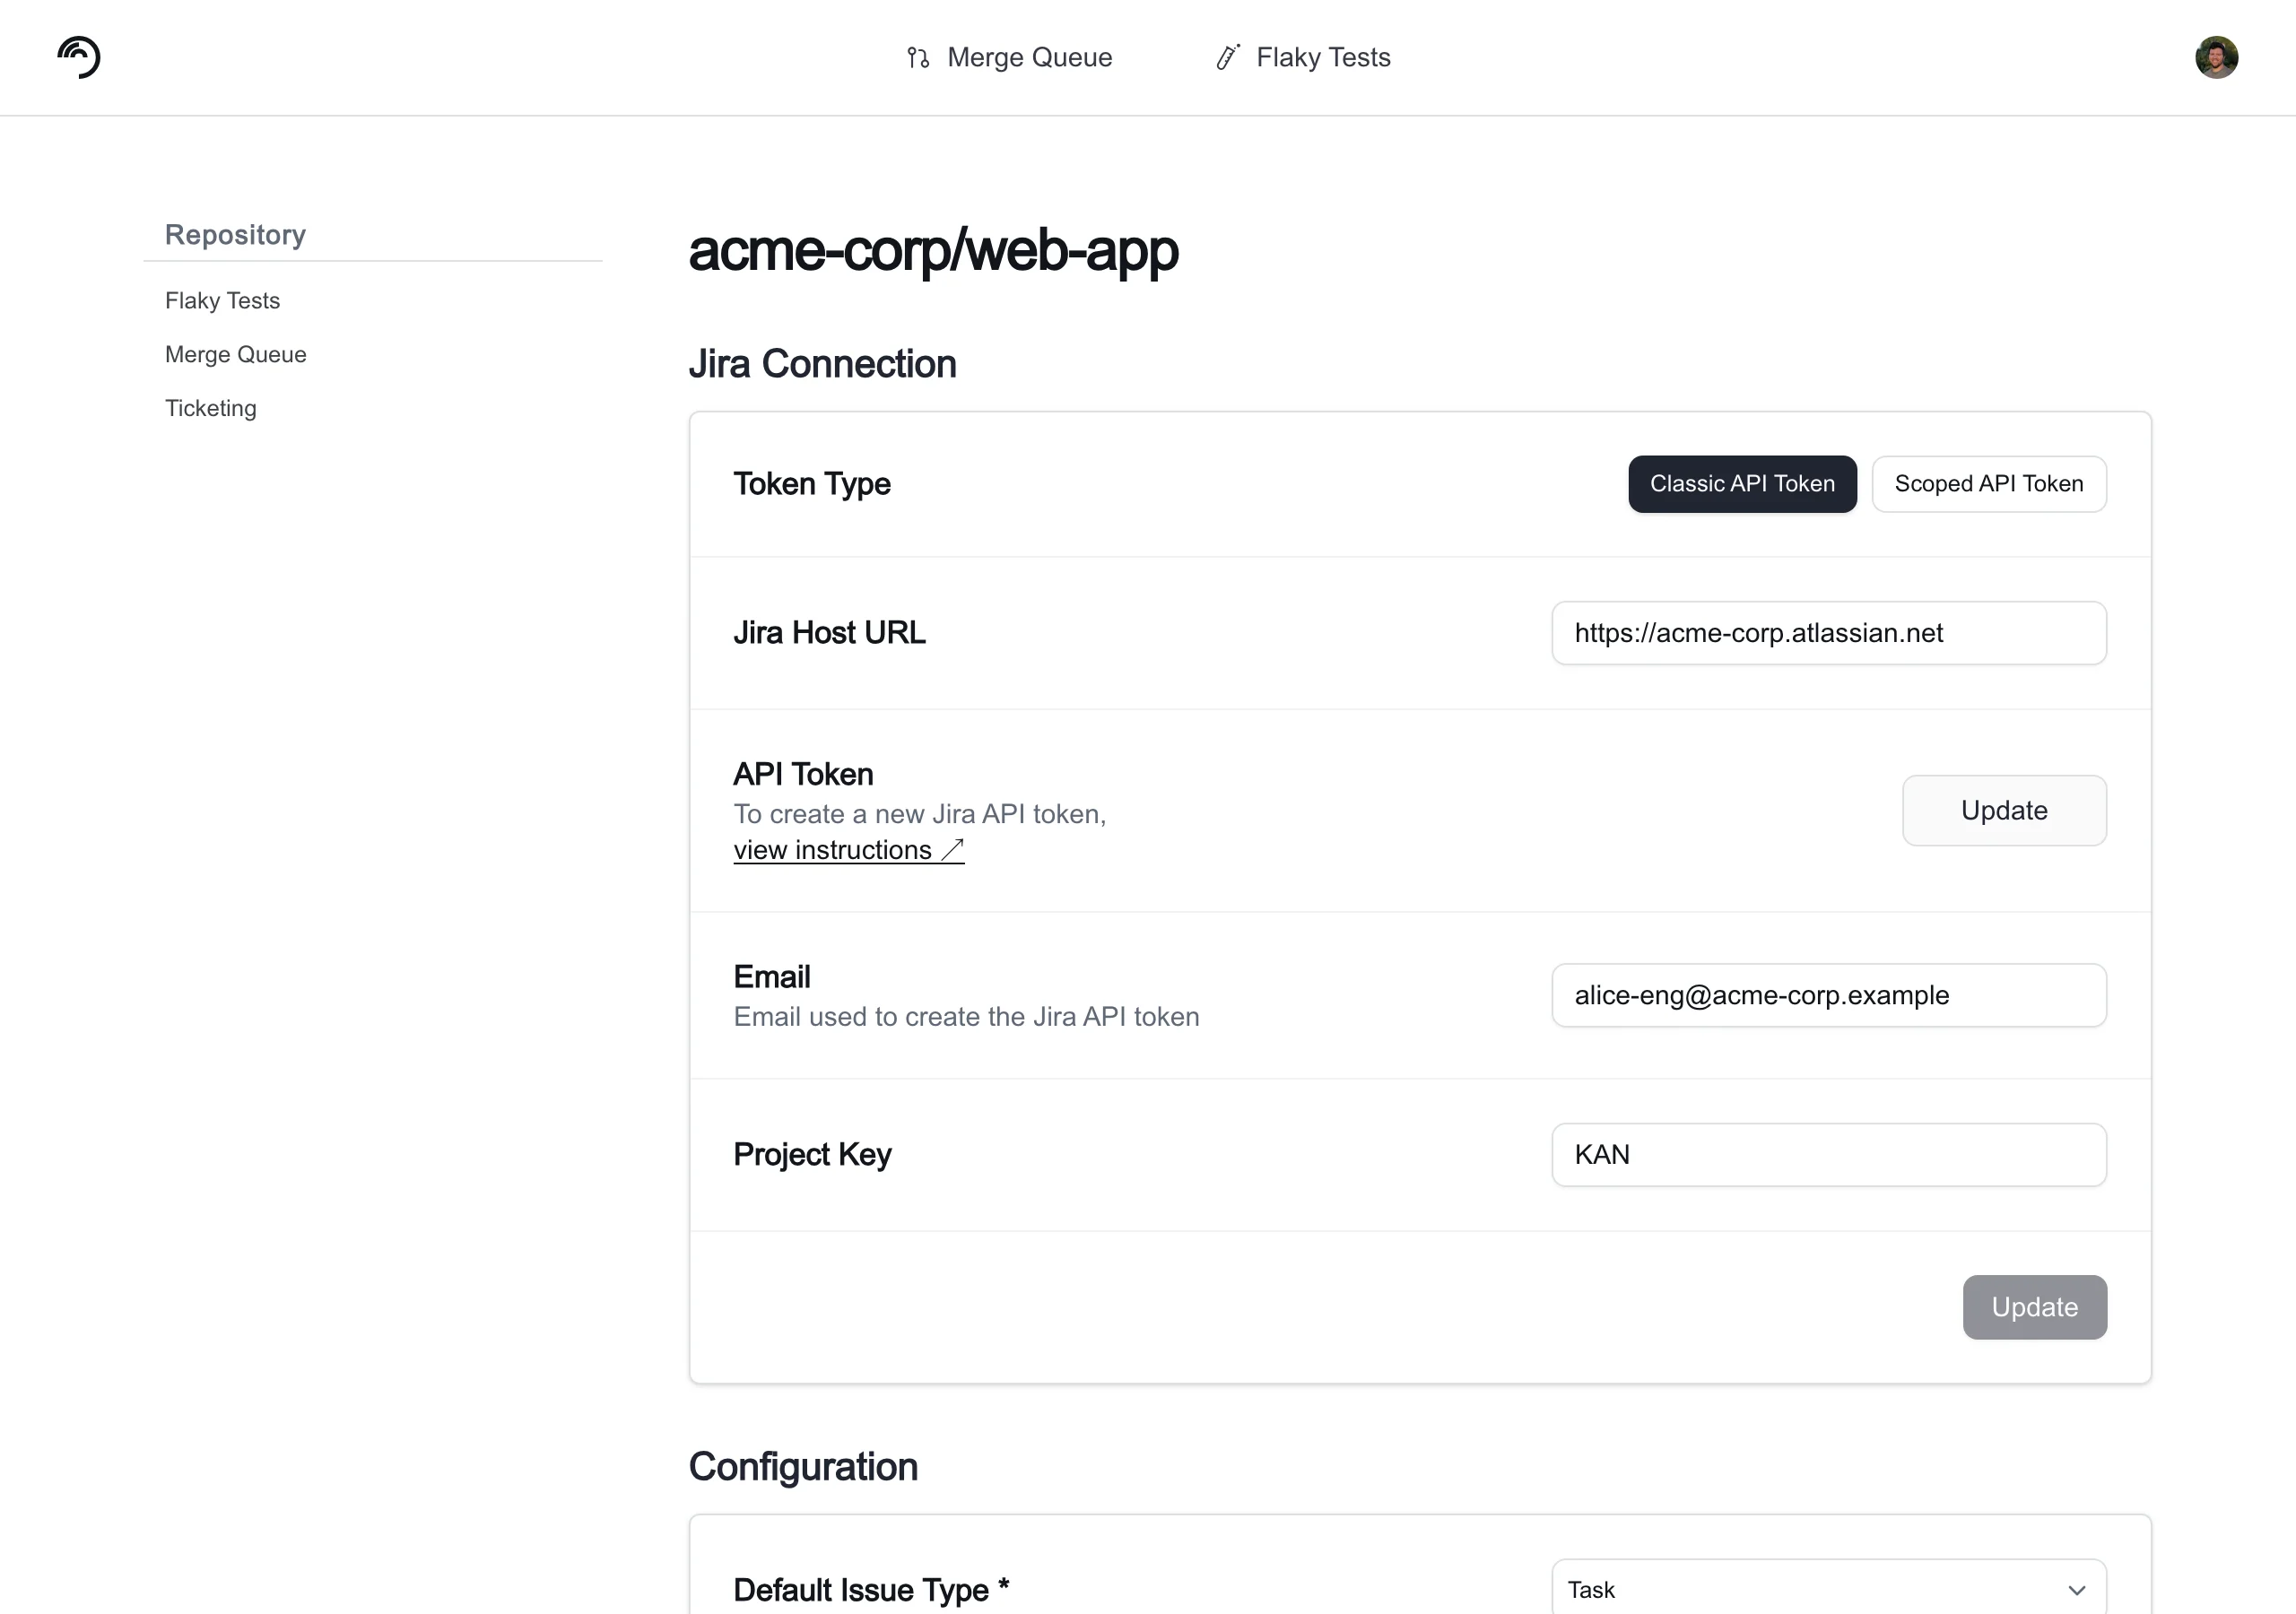
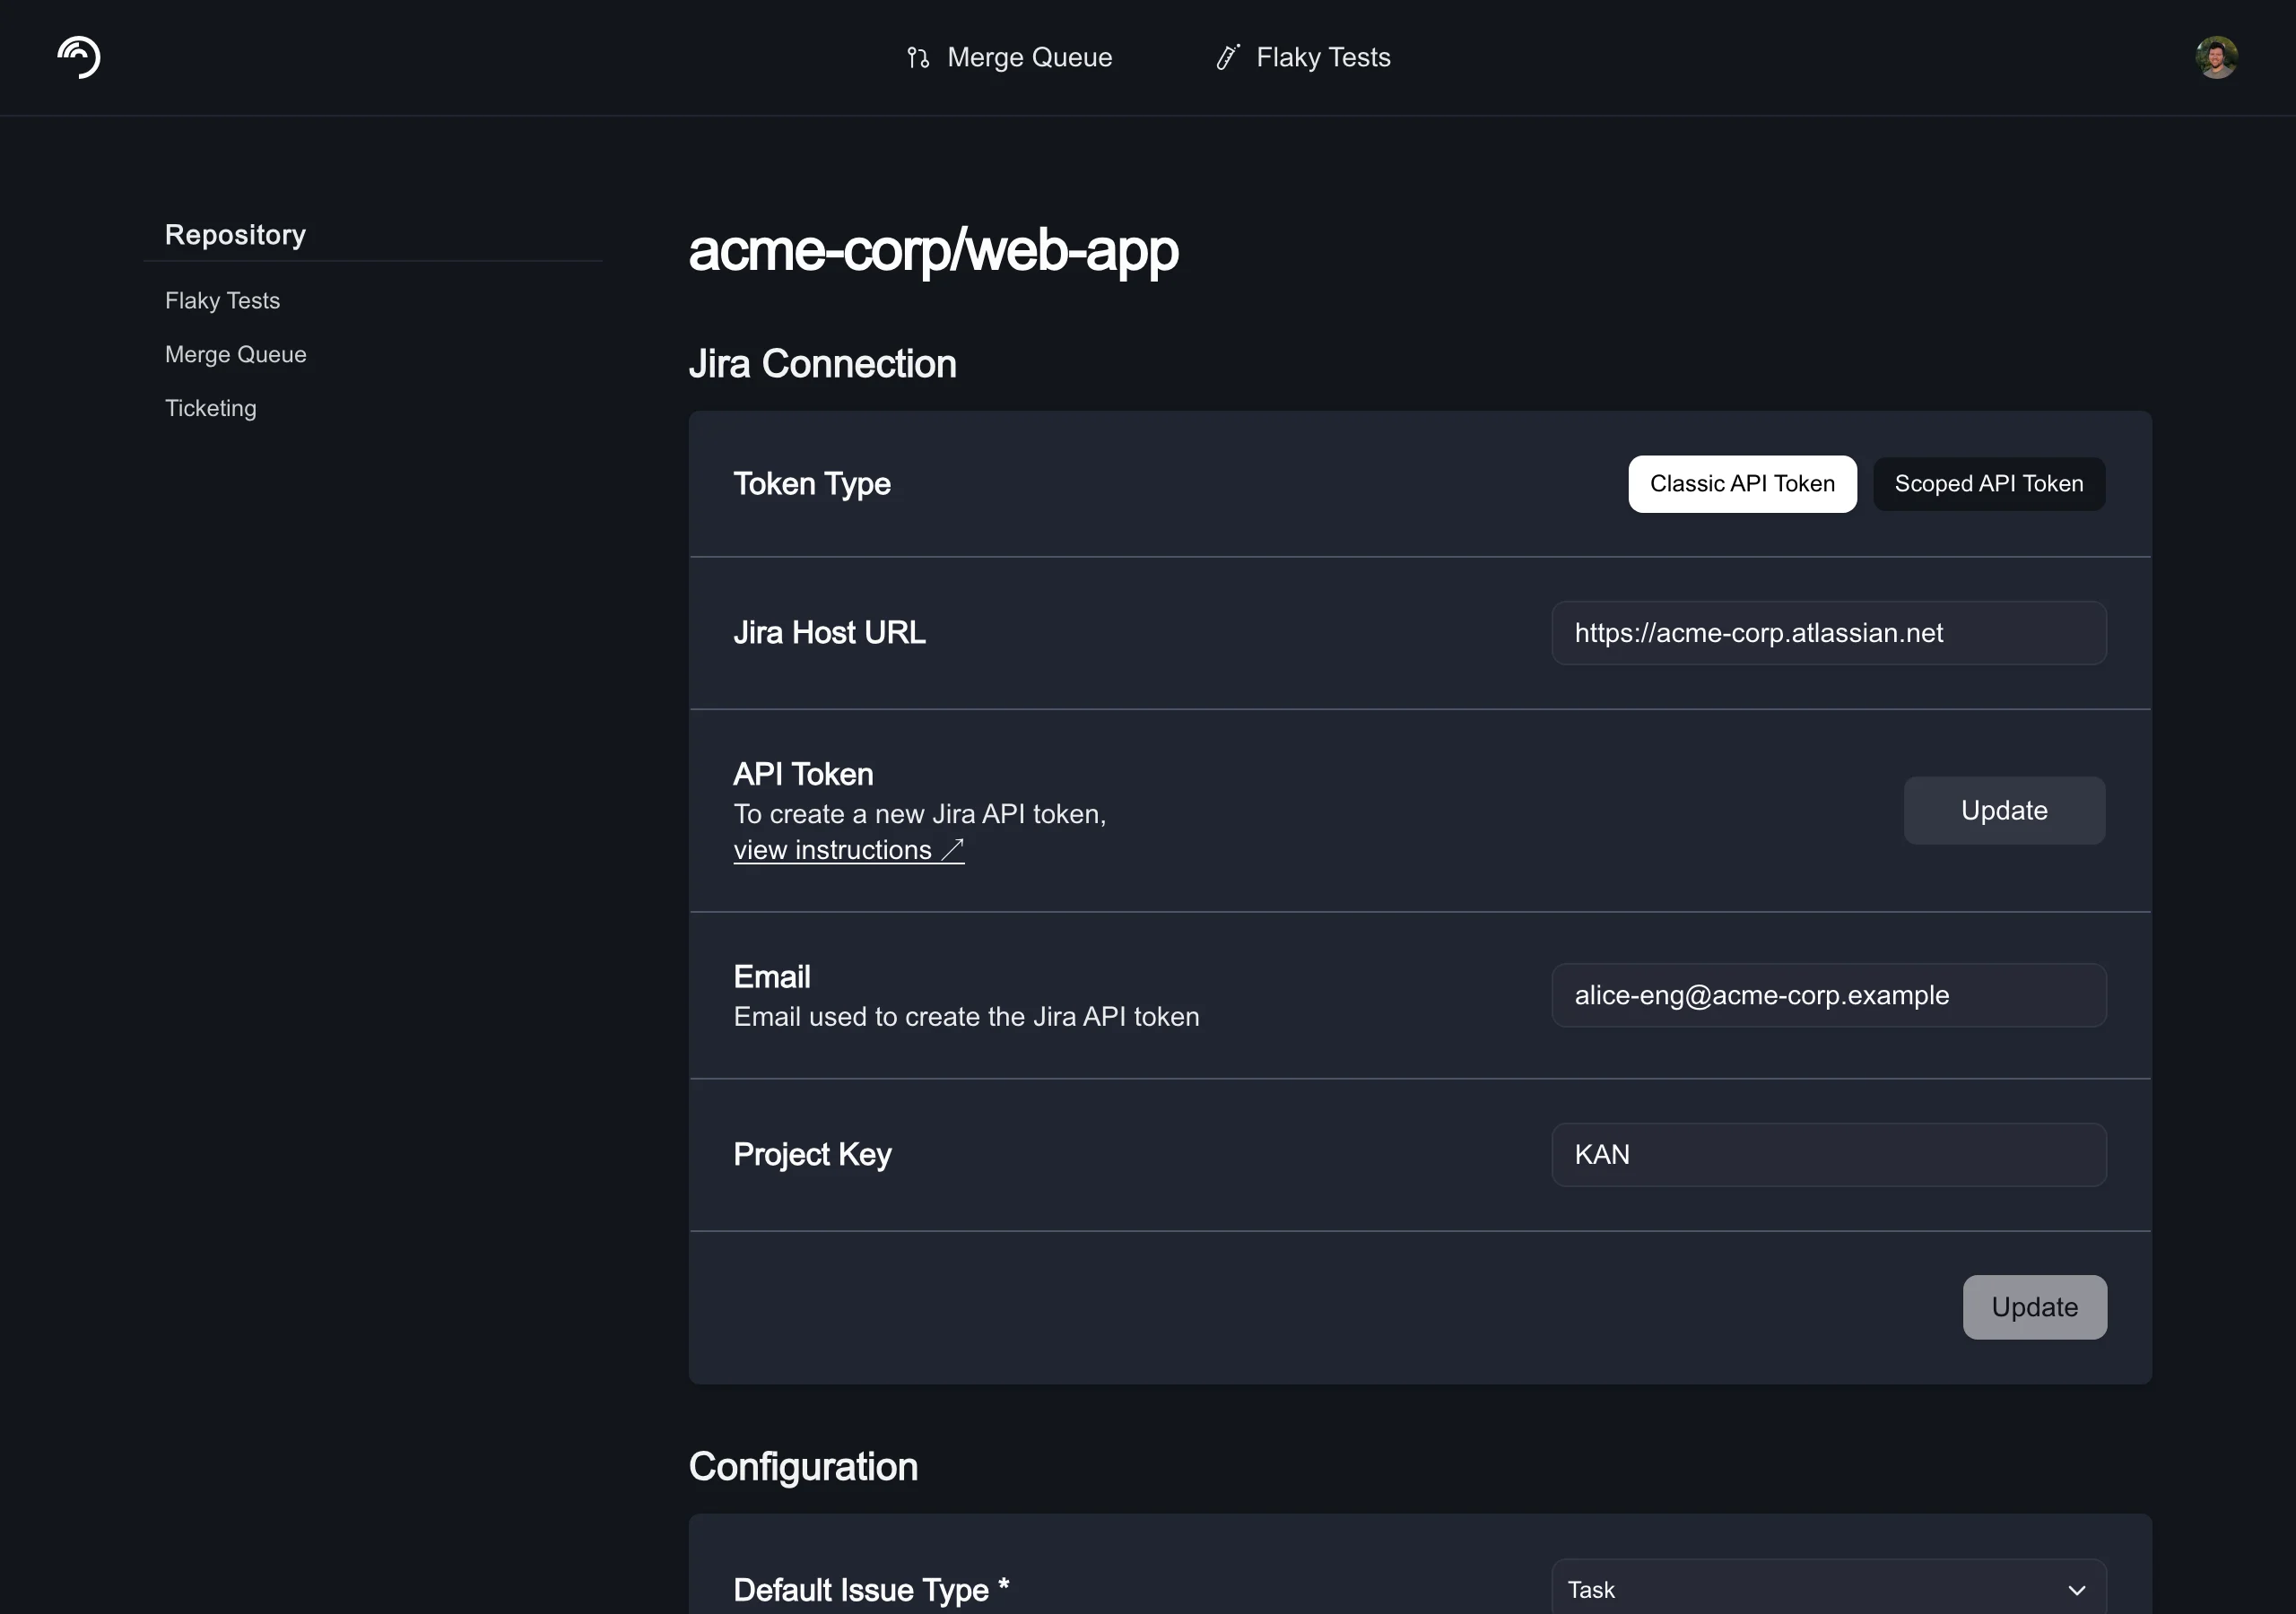 To connect a Jira Cloud project, navigate to **Settings** → **Repositories** → **\[your repository]** → **Ticketing** and select **Jira** as your Ticketing System.
Then complete the form and click Connect to Jira Cloud with the following information.
| Field Name | Description | Examples |
| ---------------------------------------- | ----------------------------------------------------------------------------------------------- | -------------------------------- |
| Jira URL | The URL to your Jira Cloud project. | `https://trunk-io.atlassian.net` |
| Project Key | The project key for your Jira project. | `KAN` |
| Email | The email associated with your Jira API token. | `johndoe@example.com` |
| [Jira API token](#api-token-permissions) | [Create your Jira API token here.](https://id.atlassian.com/manage-profile/security/api-tokens) | `ATATT*****19FNY5Q` |
| Default label(s) for new tickets | Labels applied to new Jira tickets created through Trunk Flaky Tests | `flaky-test, debt` |
Jira labels cannot contain spaces — the Trunk UI enforces this restriction in the labels field.
After connecting to Jira, you can specify a default issue type for new tickets and a default assignee for new tickets.
### API Token permissions
Your Jira user account must have the following project permissions to create a Jira API token that allows Trunk to read, create, and assign tickets automatically:
* *Create issues*
* *Assign issues* OR *Browse users and groups* (global permission)
* *Browse projects*
* If issue-level security is configured, issue-level security permissions must be granted to read issues.
You need to create an API token with the following scopes:
* Required scopes (classic)
* `read:jira-work`
* `write:jira-work`
* `read:jira-user`
* Required scopes (granular):
* `read:issue:jira`
* `read:issue-meta:jira`
* `read:issue-security-level:jira`
* `read:issue.vote:jira`
* `read:issue.changelog:jira`
* `read:avatar:jira`
* `read:status:jira`
* `read:user:jira`
* `read:field-configuration:jira`
* `read:application-role:jira`
* `read:group:jira`
* `read:issue-type:jira`
* `read:project:jira`
* `read:project.property:jira`
* `read:issue-type-hierarchy:jira`
* `read:project-category:jira`
* `read:project-version:jira`
* `read:project.component:jira`
* `read:permission:jira`
* `write:issue:jira`
* `write:comment:jira`
* `write:comment.property:jira`
* `write:attachment:jira`
Jira tokens cannot last longer than 365 days. Once the token expires, you will need to generate a new API token.
## Create a new ticket
You can create a new ticket for any test listed in Trunk Flaky Tests.
There are 2 ways to create a new ticket in the Flaky Tests dashboard:
* Click on the options menu for any test case on the repo overview dashboard
To connect a Jira Cloud project, navigate to **Settings** → **Repositories** → **\[your repository]** → **Ticketing** and select **Jira** as your Ticketing System.
Then complete the form and click Connect to Jira Cloud with the following information.
| Field Name | Description | Examples |
| ---------------------------------------- | ----------------------------------------------------------------------------------------------- | -------------------------------- |
| Jira URL | The URL to your Jira Cloud project. | `https://trunk-io.atlassian.net` |
| Project Key | The project key for your Jira project. | `KAN` |
| Email | The email associated with your Jira API token. | `johndoe@example.com` |
| [Jira API token](#api-token-permissions) | [Create your Jira API token here.](https://id.atlassian.com/manage-profile/security/api-tokens) | `ATATT*****19FNY5Q` |
| Default label(s) for new tickets | Labels applied to new Jira tickets created through Trunk Flaky Tests | `flaky-test, debt` |
Jira labels cannot contain spaces — the Trunk UI enforces this restriction in the labels field.
After connecting to Jira, you can specify a default issue type for new tickets and a default assignee for new tickets.
### API Token permissions
Your Jira user account must have the following project permissions to create a Jira API token that allows Trunk to read, create, and assign tickets automatically:
* *Create issues*
* *Assign issues* OR *Browse users and groups* (global permission)
* *Browse projects*
* If issue-level security is configured, issue-level security permissions must be granted to read issues.
You need to create an API token with the following scopes:
* Required scopes (classic)
* `read:jira-work`
* `write:jira-work`
* `read:jira-user`
* Required scopes (granular):
* `read:issue:jira`
* `read:issue-meta:jira`
* `read:issue-security-level:jira`
* `read:issue.vote:jira`
* `read:issue.changelog:jira`
* `read:avatar:jira`
* `read:status:jira`
* `read:user:jira`
* `read:field-configuration:jira`
* `read:application-role:jira`
* `read:group:jira`
* `read:issue-type:jira`
* `read:project:jira`
* `read:project.property:jira`
* `read:issue-type-hierarchy:jira`
* `read:project-category:jira`
* `read:project-version:jira`
* `read:project.component:jira`
* `read:permission:jira`
* `write:issue:jira`
* `write:comment:jira`
* `write:comment.property:jira`
* `write:attachment:jira`
Jira tokens cannot last longer than 365 days. Once the token expires, you will need to generate a new API token.
## Create a new ticket
You can create a new ticket for any test listed in Trunk Flaky Tests.
There are 2 ways to create a new ticket in the Flaky Tests dashboard:
* Click on the options menu for any test case on the repo overview dashboard
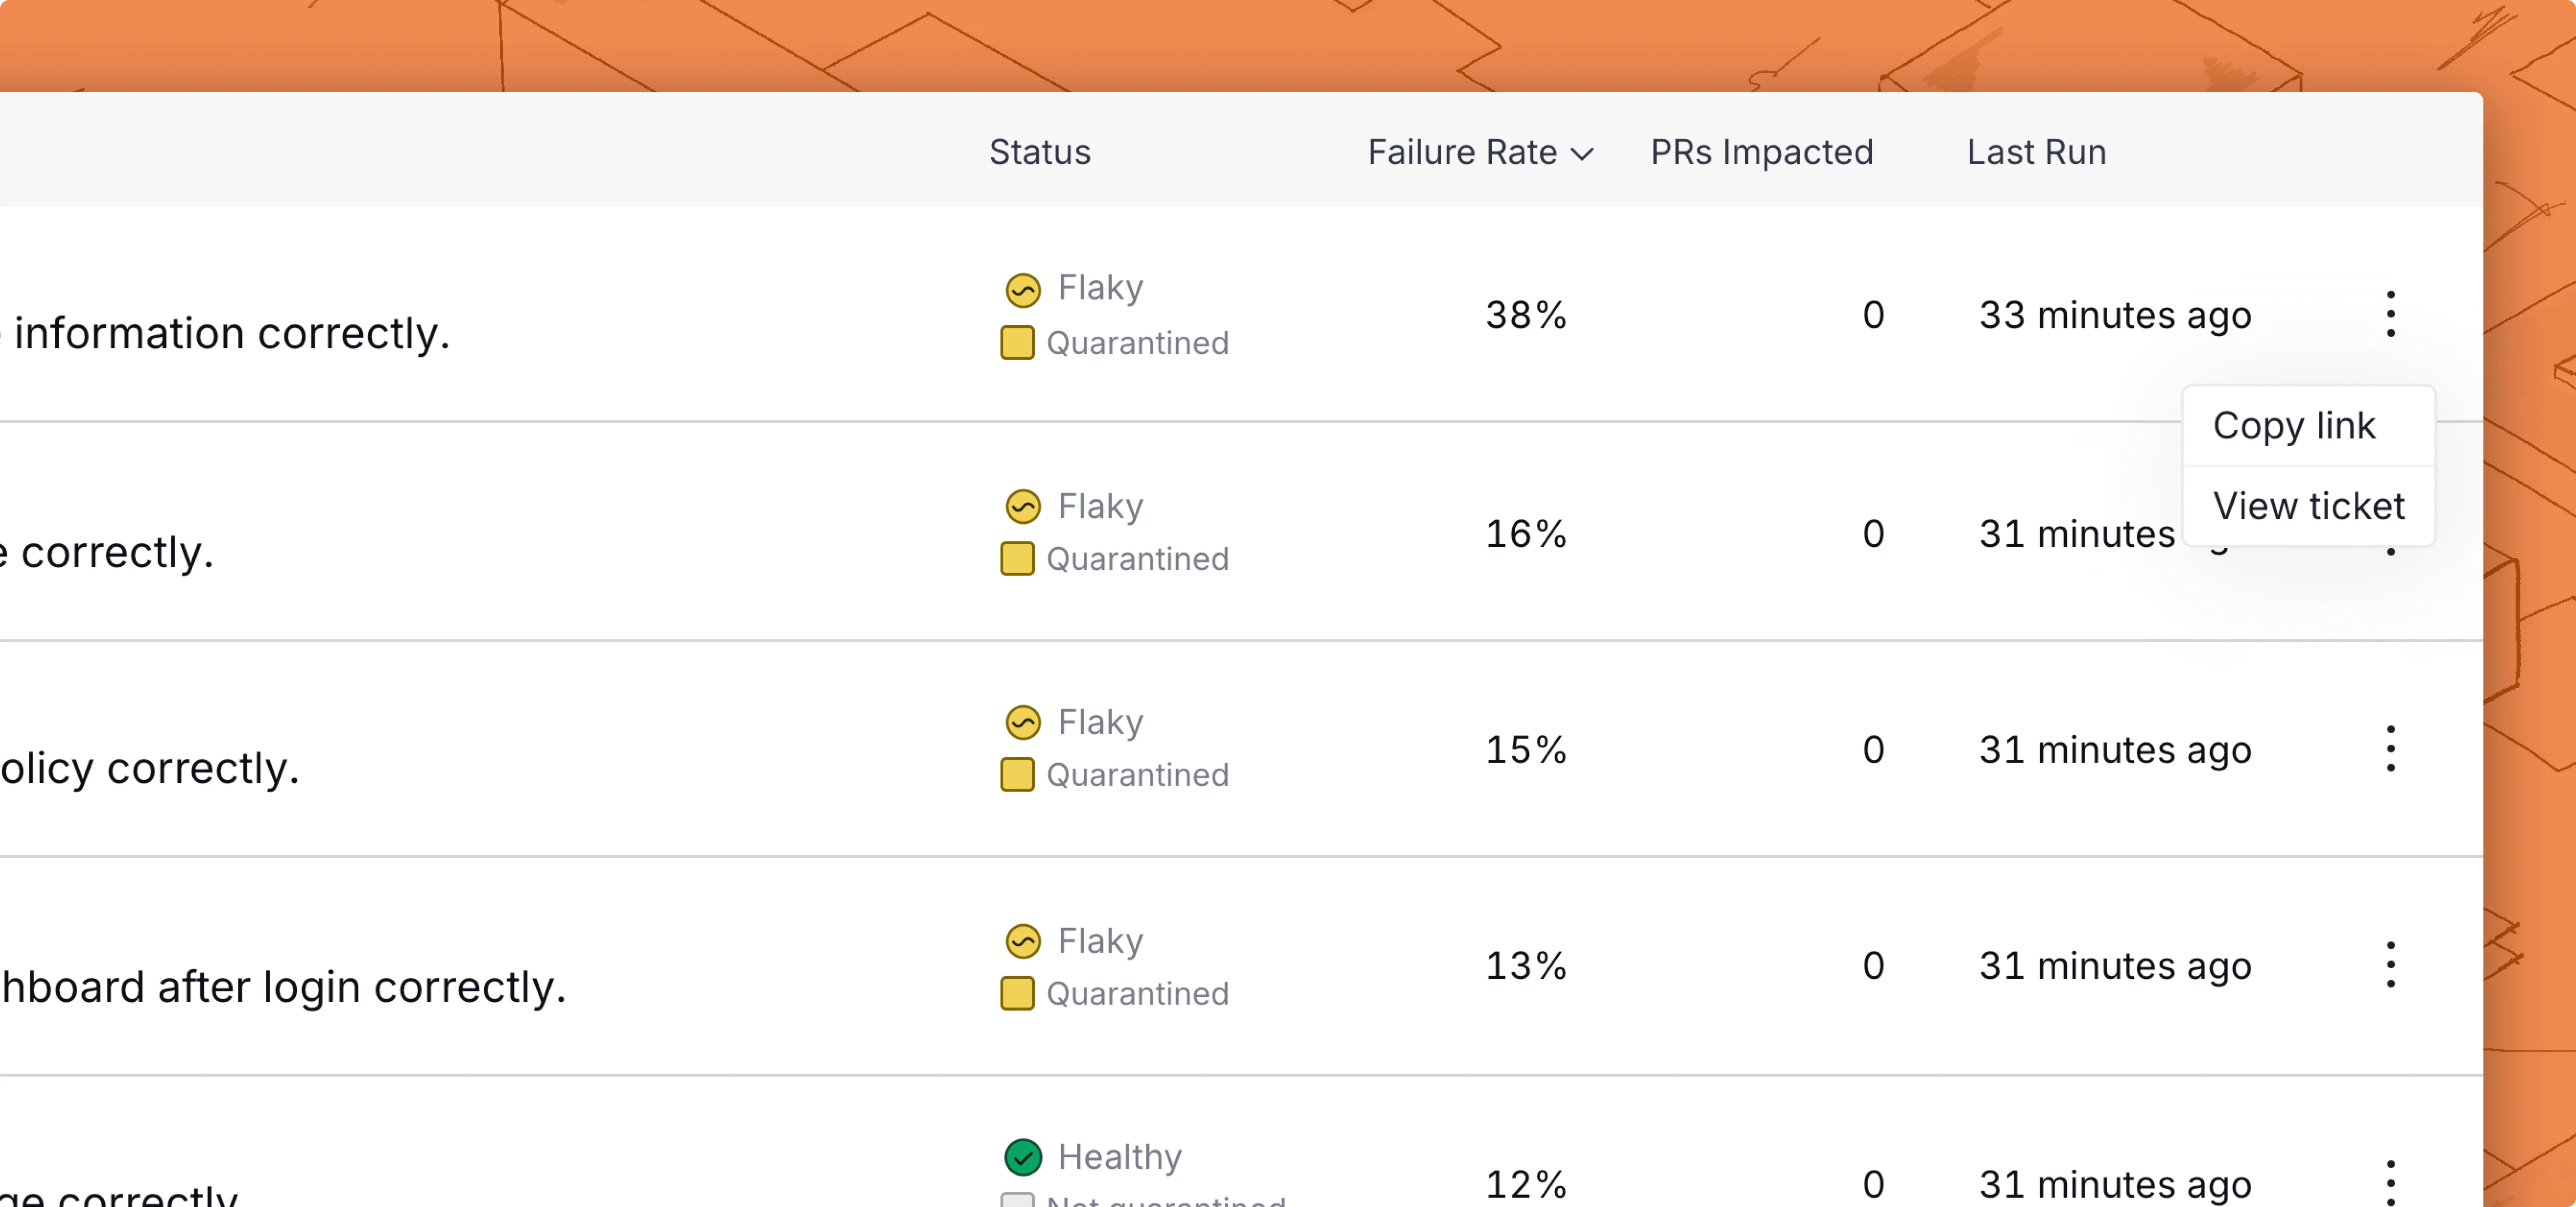
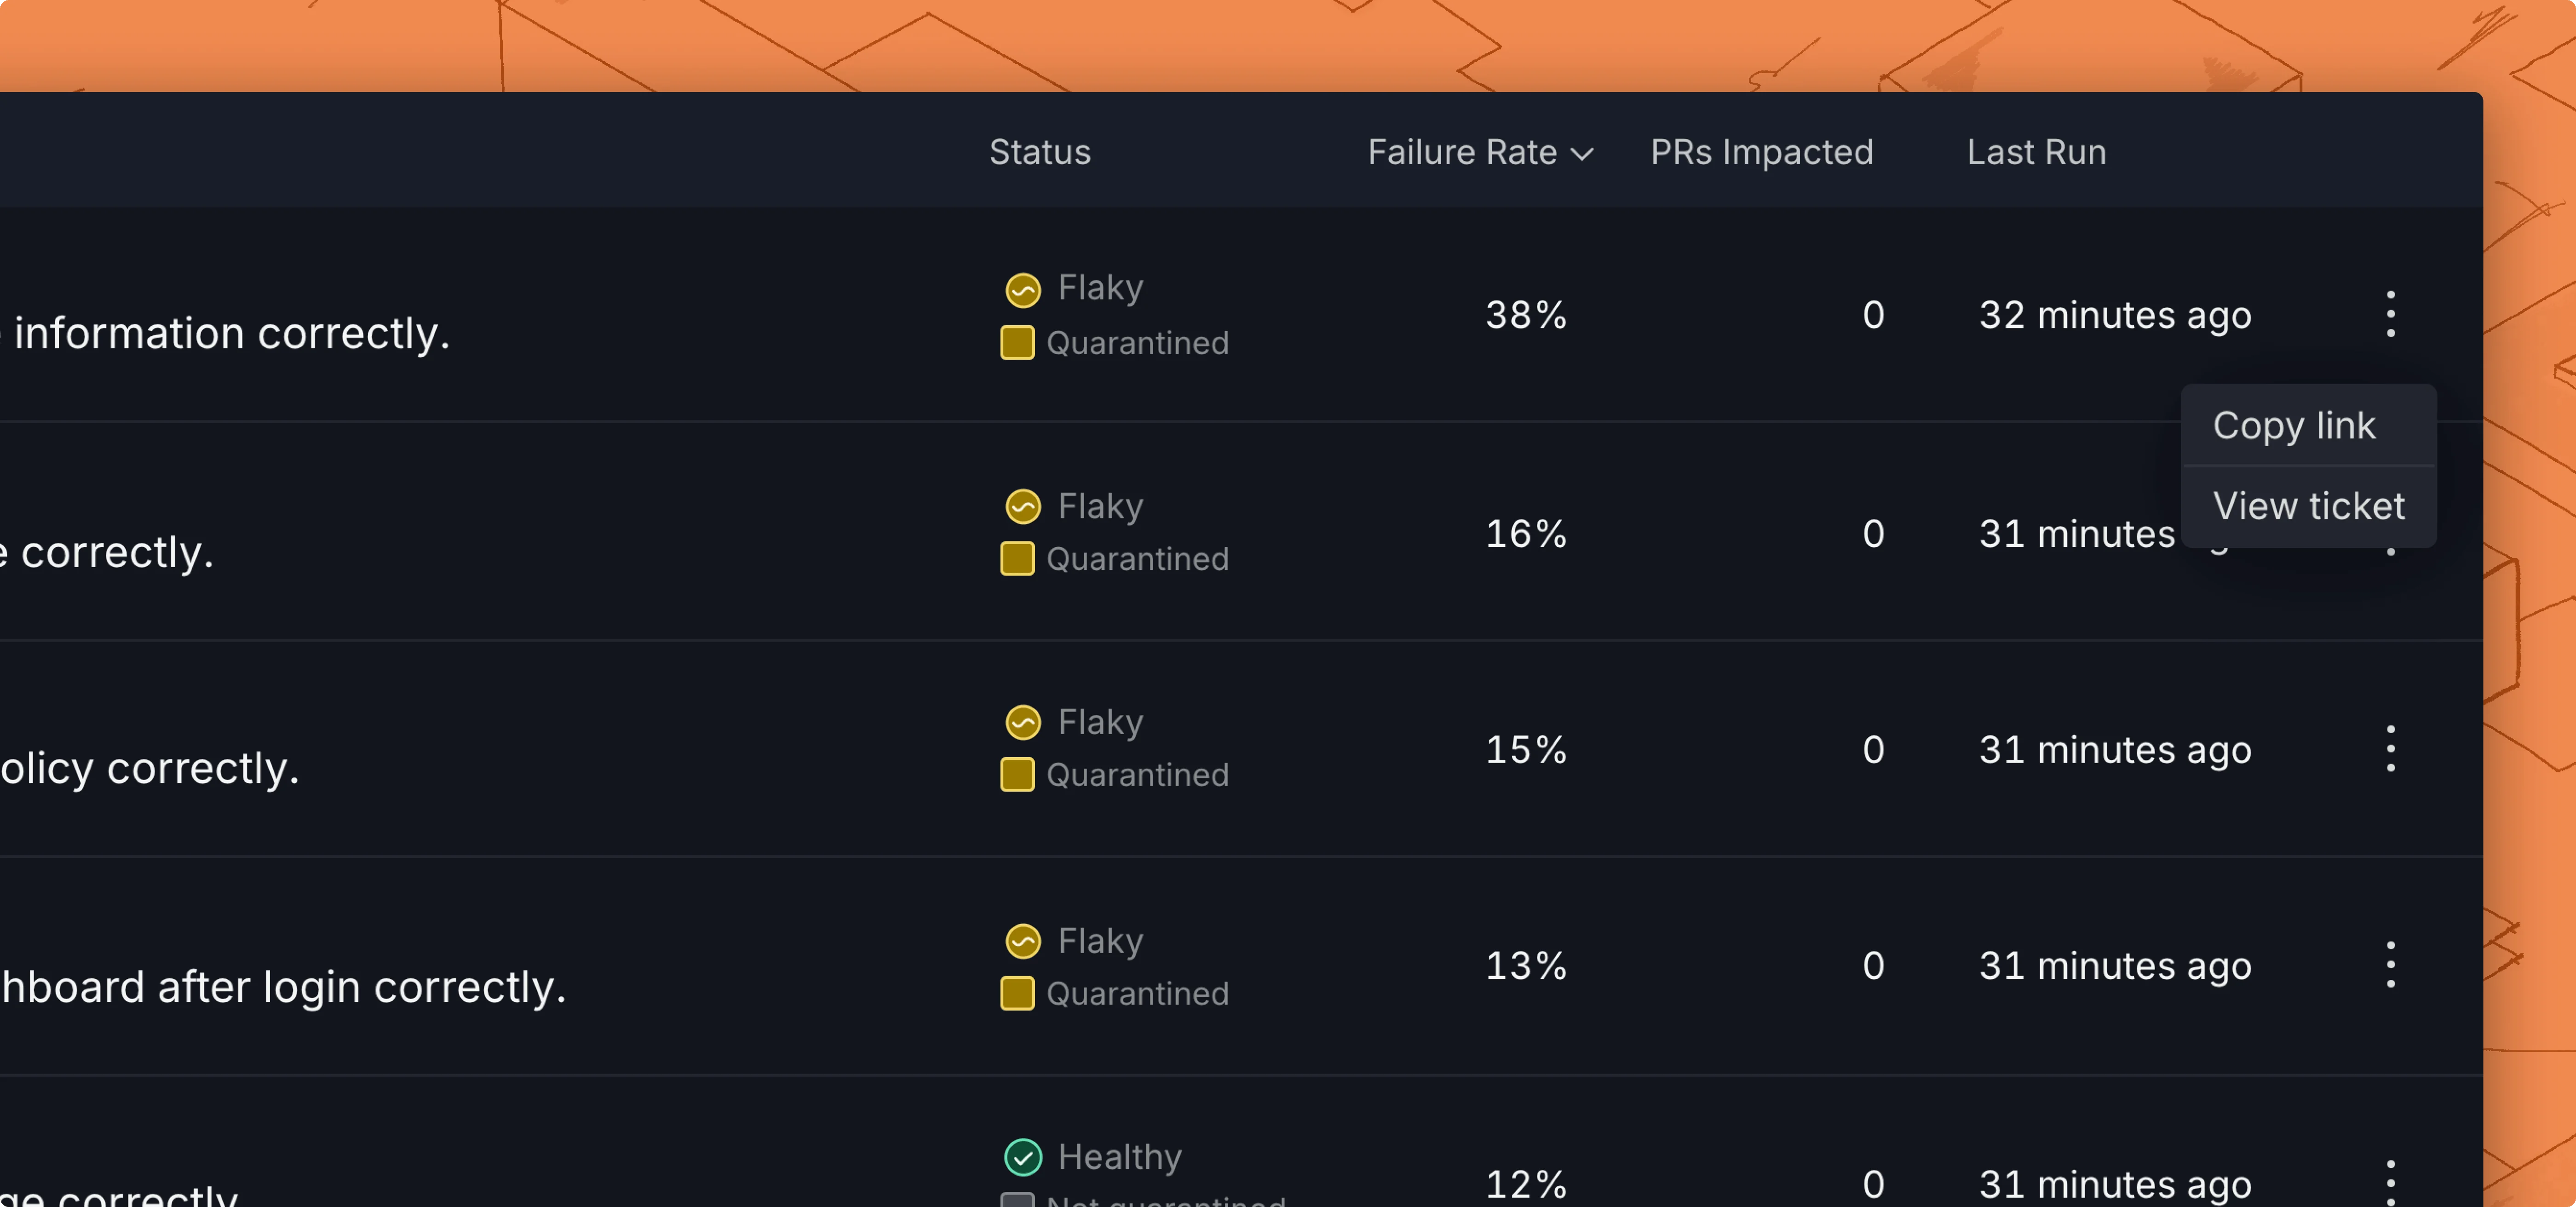 * Use the Create ticket button in the top left corner of the [test case details](../../dashboard#test-case-details) page.
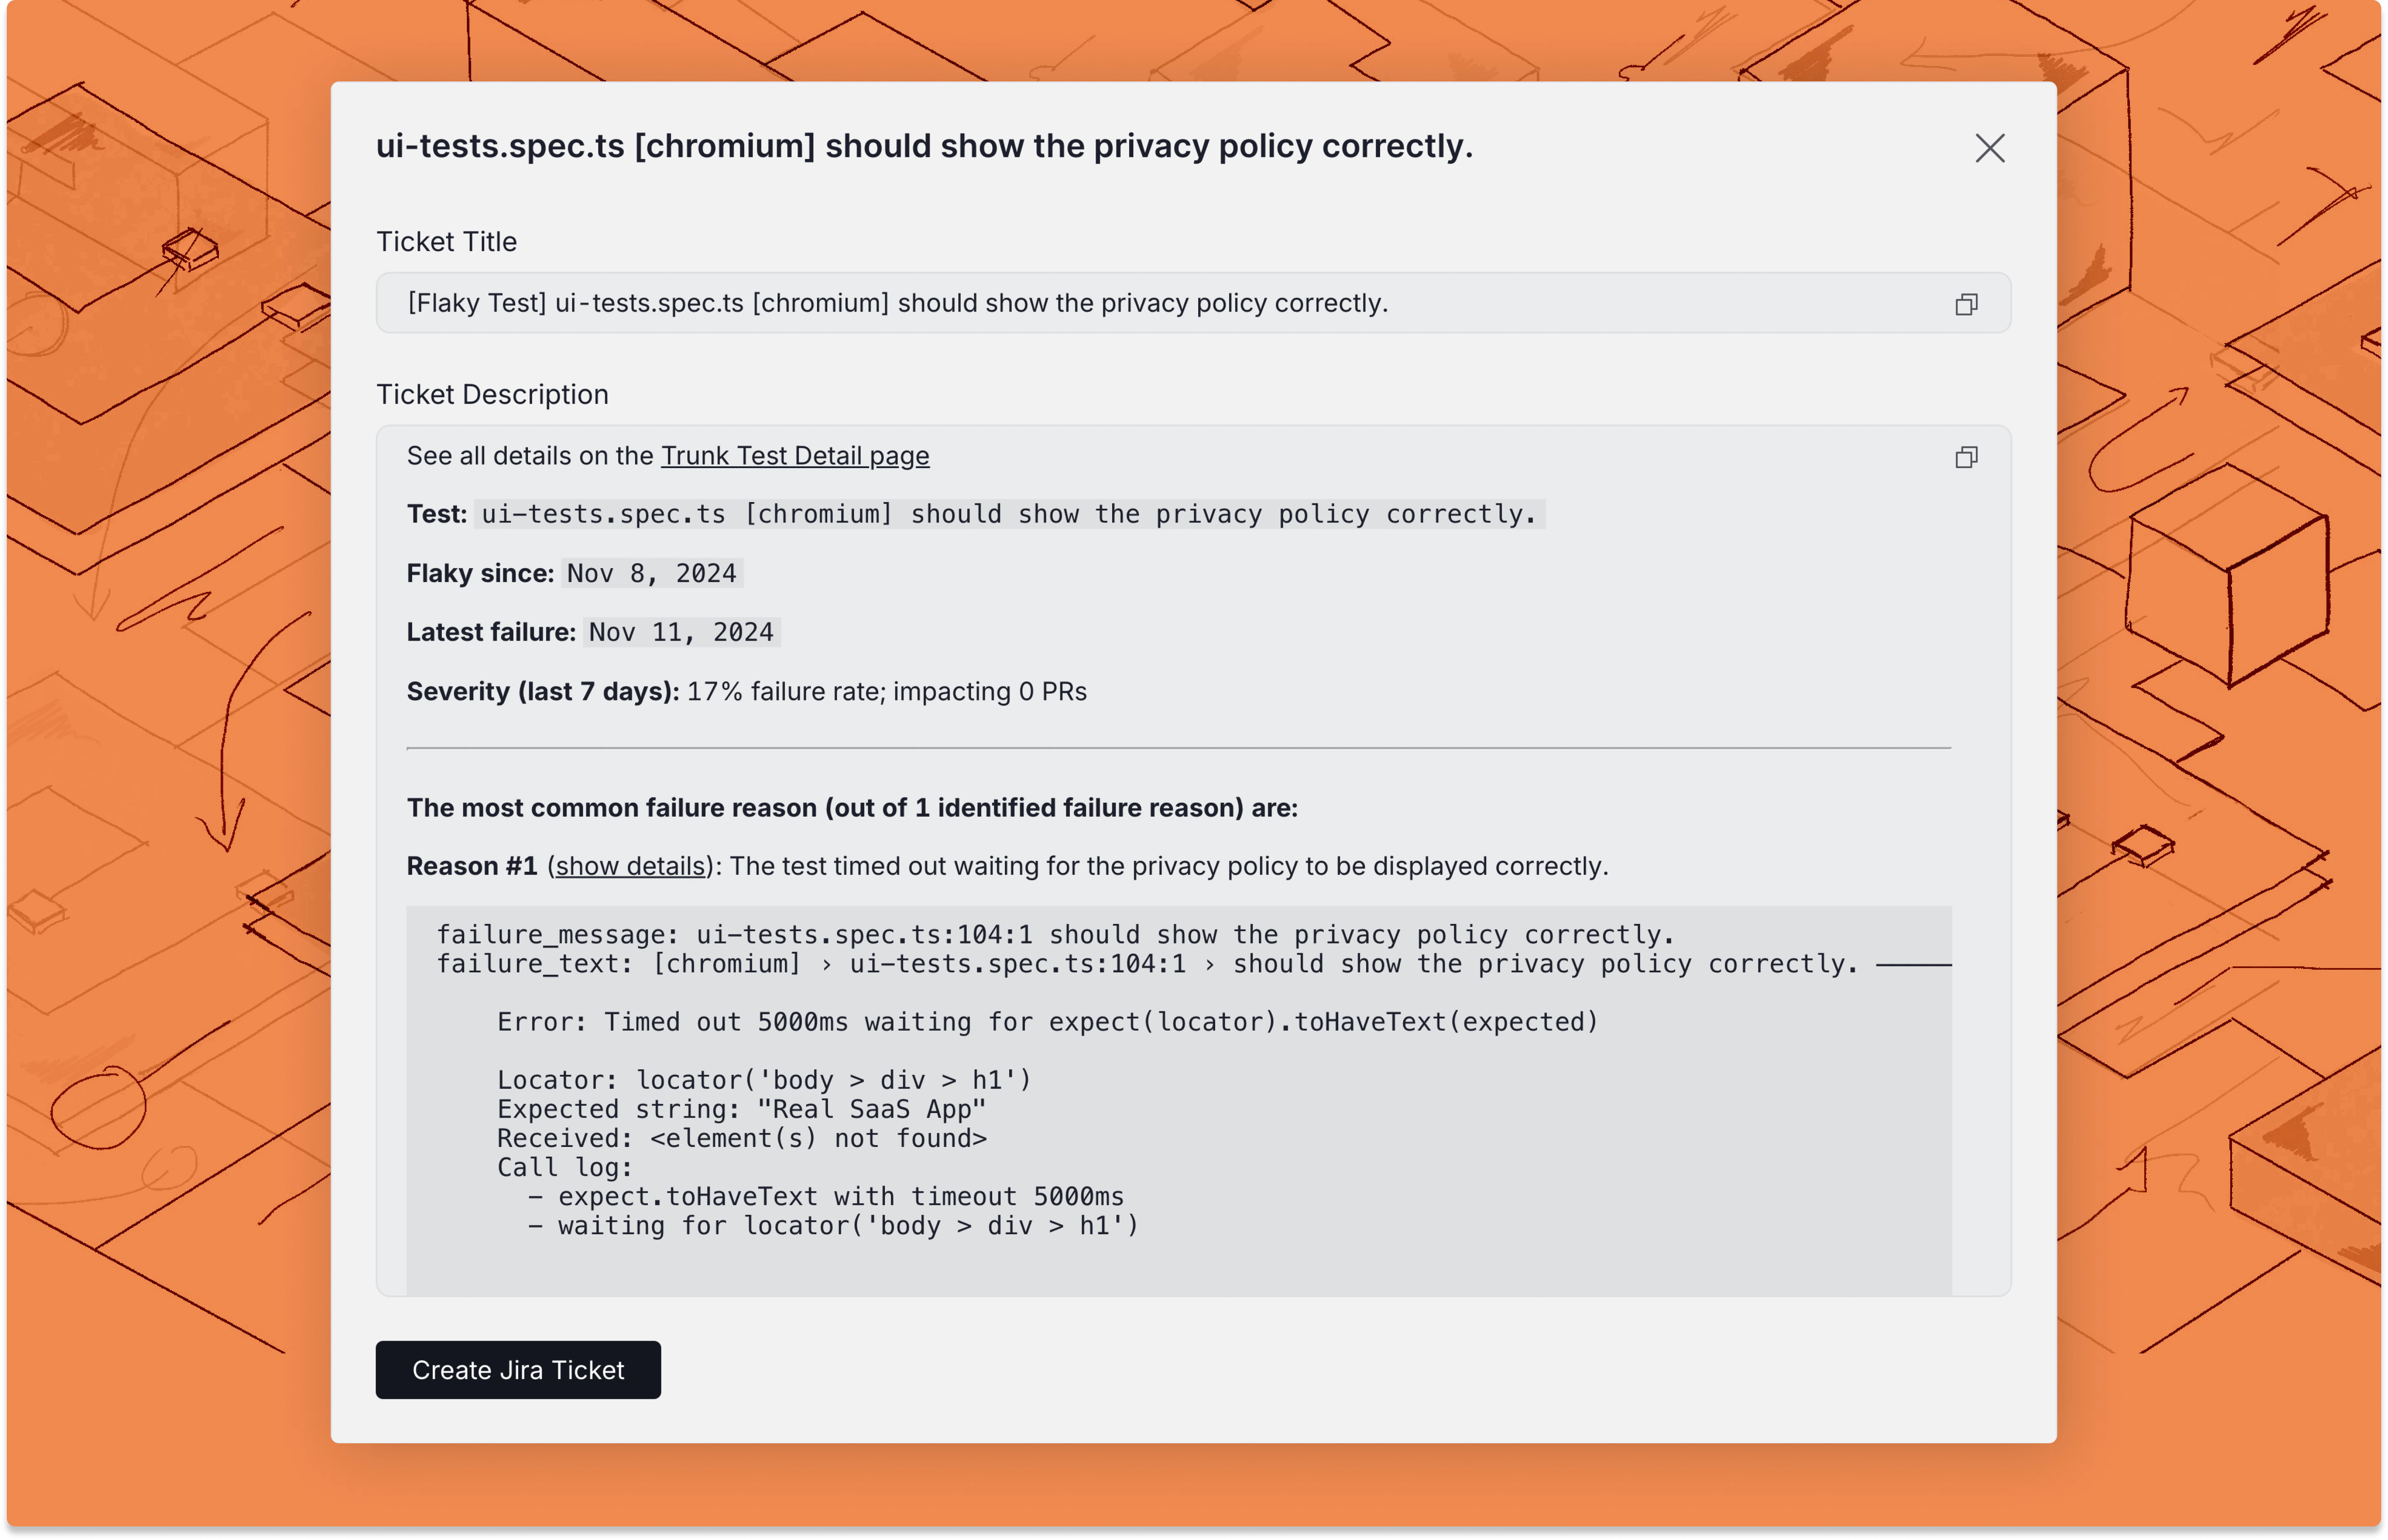
Before you create the ticket, you will have a preview of the title and description.
* Use the Create ticket button in the top left corner of the [test case details](../../dashboard#test-case-details) page.
Before you create the ticket, you will have a preview of the title and description.
 ### Create with Jira
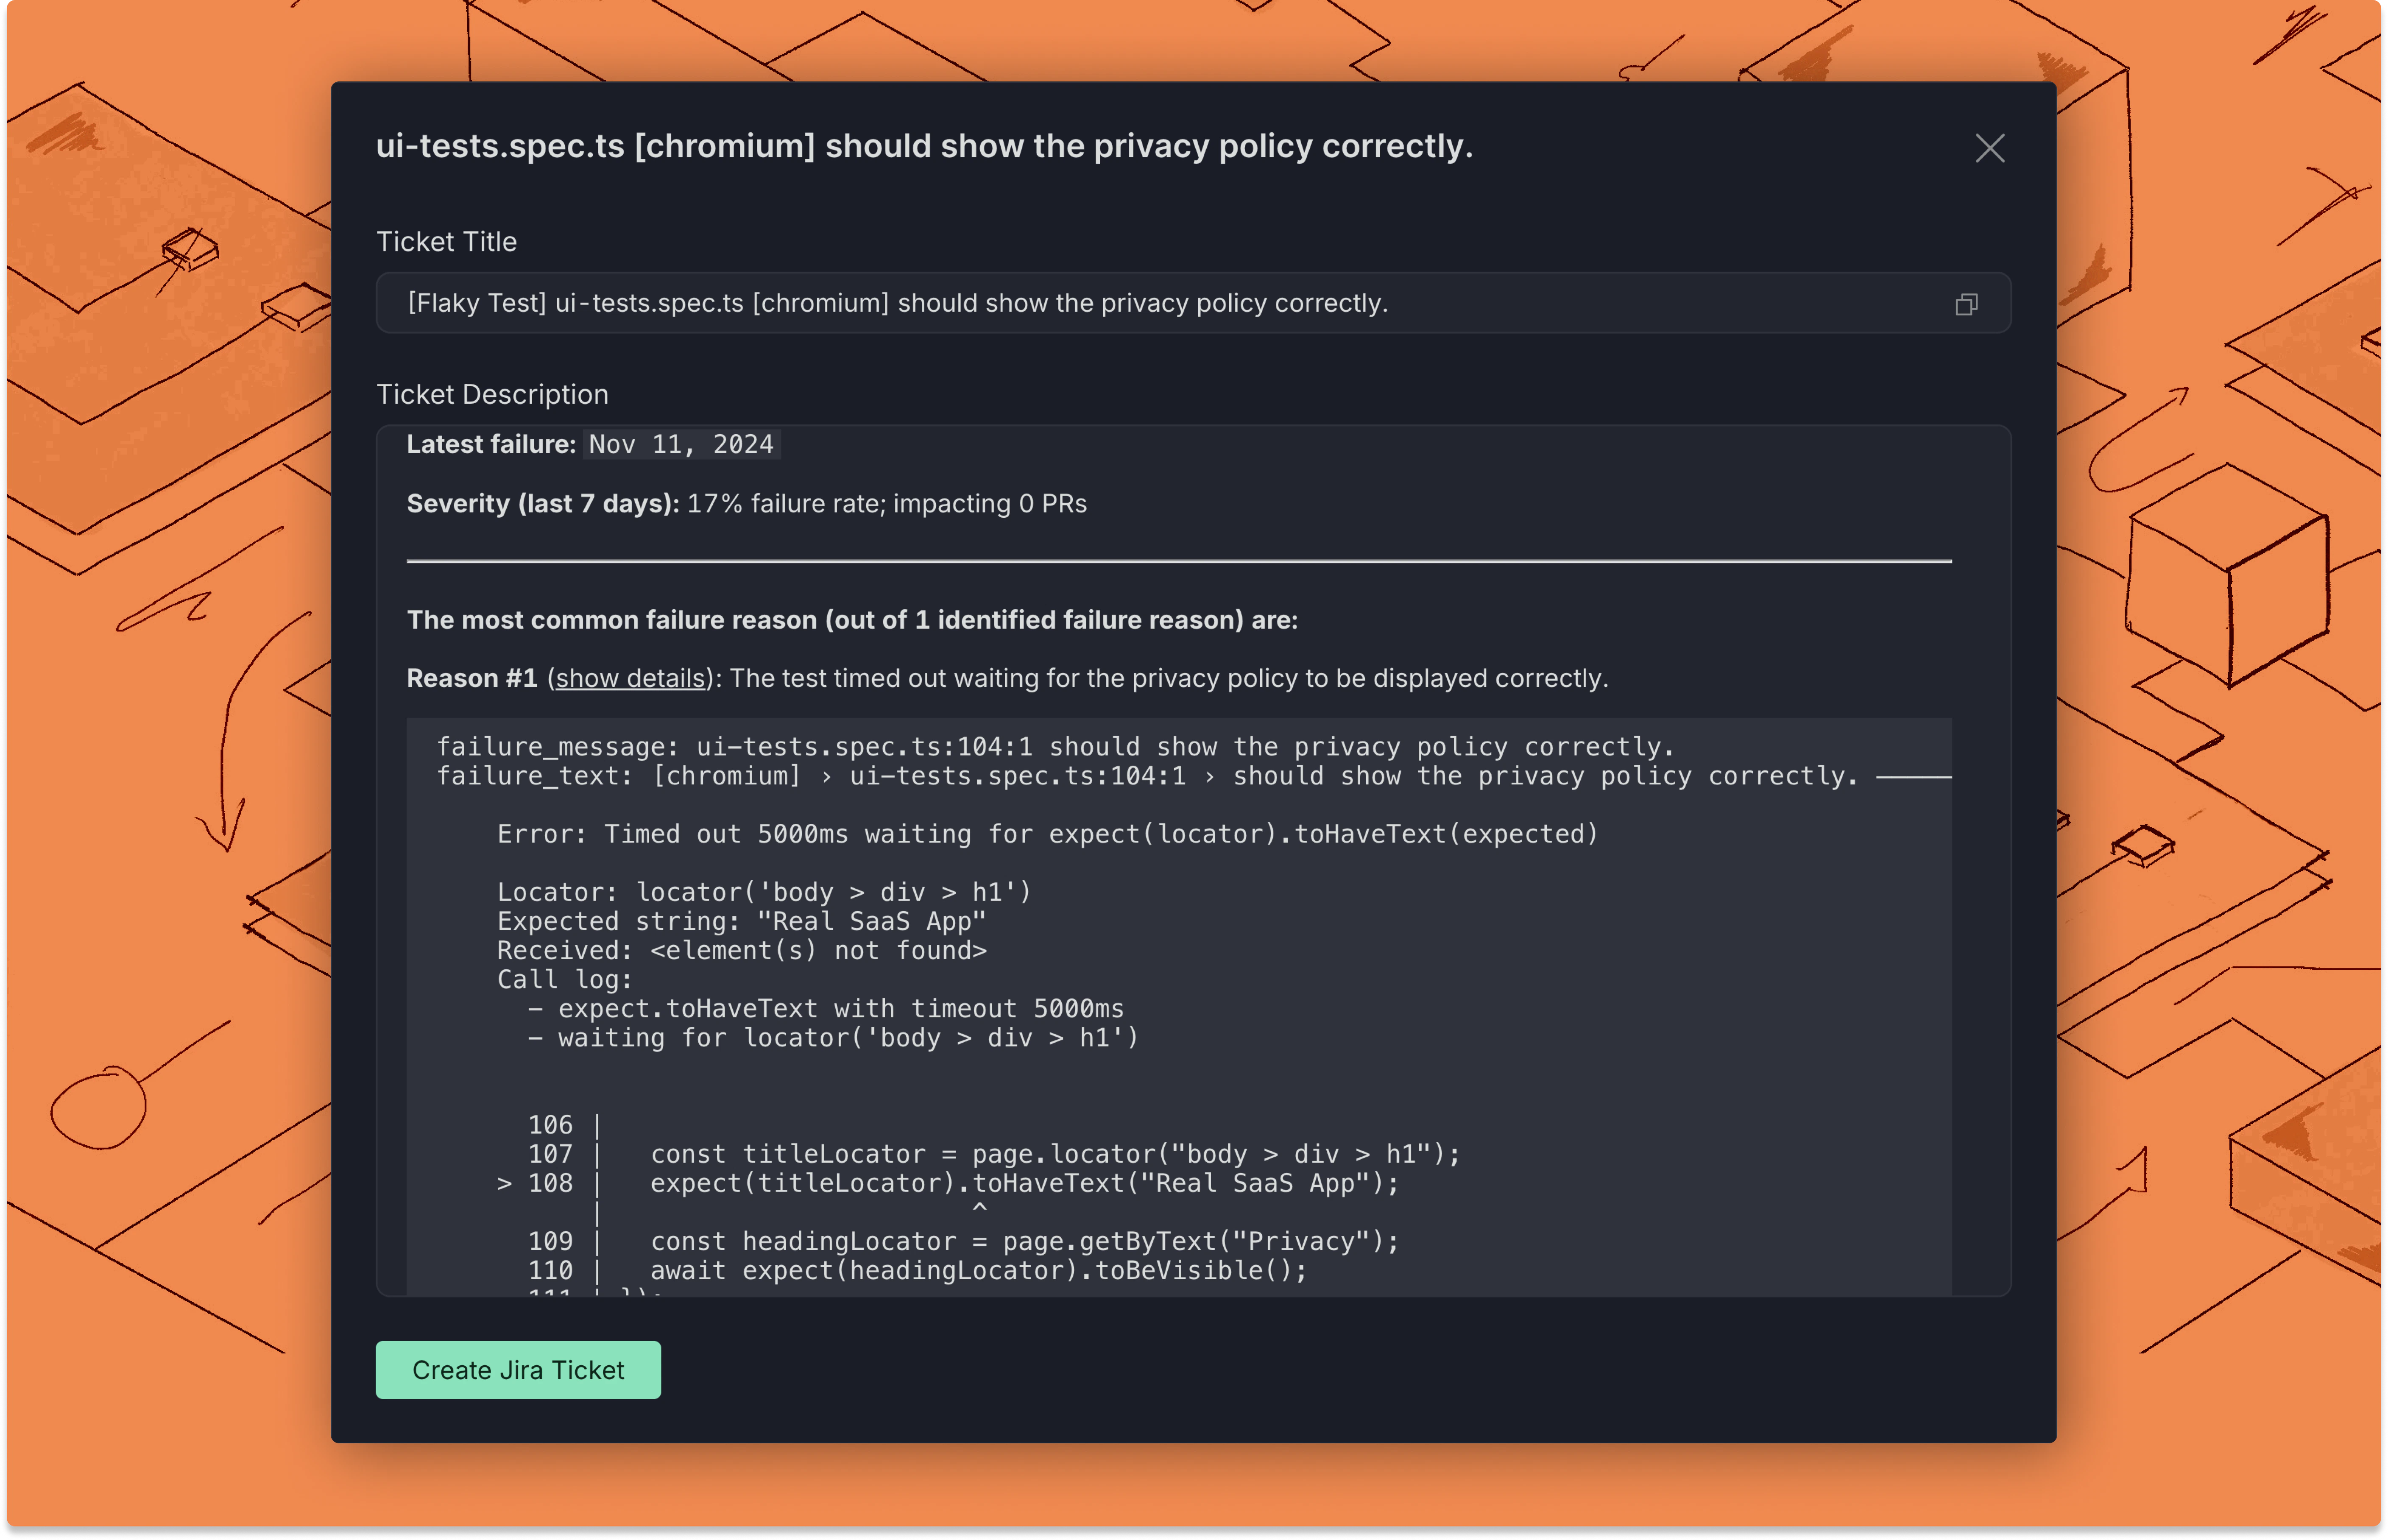
If you are connected to Jira, you can click the **Create Jira Ticket** button at the end of the modal, which will automatically create a ticket with the configured labels and assignees.
### Link existing tickets to tests
If you already have a ticket in Jira that you want to link to a test in the dashboard, you can use the [Link Ticket to Test Case API](../../reference/api-reference#post-flaky-tests-link-ticket-to-test-case).
## Custom Fields
Some Jira projects require additional fields beyond the standard fields (summary, description, and issue type) when creating tickets. Trunk supports configuring default values for any Jira field on a per-issue-type basis. Users can also override those defaults when creating a ticket.
### Configuring custom fields
In the Jira integration settings (**Settings** → **Repositories** → **\[your repository]** → **Ticketing**), select an issue type. Trunk fetches all available fields for that issue type from the Jira API and displays inputs for each supported field.
For each field, you can:
* Set a default value that pre-fills the field when a ticket is created
* Check **Require user to fill at creation** to leave the field blank in settings and prompt the user to fill it in the create ticket modal instead
Trunk automatically detects required fields (as marked by your Jira project) and shows a validation error if no default is set and the field is not marked for user input.
Fields are rendered using an appropriate input type based on the Jira field schema:
| Jira schema | Input type |
| -------------------------------- | ----------------------------------------- |
| `string` | Text input |
| `number` | Number input |
| `option` | Searchable dropdown |
| `user` | User picker dropdown |
| `array` of `string` | Chip input (comma or Enter to add values) |
| `text` / `string` with text hint | Text input |
The `reporter` field is treated as optional even when Jira marks it as required. Jira automatically assigns the API token owner as reporter if the field is not specified.
The following fields are always excluded from the custom field configuration because they are managed elsewhere in the ticket creation flow:
`summary`, `description`, `project`, `issuetype`, `attachment`, `issuelinks`, `parent`
### Overriding defaults at ticket creation
When creating a ticket from the Flaky Tests dashboard, the create ticket modal shows inputs for any field that has a configured default or is marked for user input. Users can edit pre-filled defaults before submitting.
### Create with Jira
If you are connected to Jira, you can click the **Create Jira Ticket** button at the end of the modal, which will automatically create a ticket with the configured labels and assignees.
### Link existing tickets to tests
If you already have a ticket in Jira that you want to link to a test in the dashboard, you can use the [Link Ticket to Test Case API](../../reference/api-reference#post-flaky-tests-link-ticket-to-test-case).
## Custom Fields
Some Jira projects require additional fields beyond the standard fields (summary, description, and issue type) when creating tickets. Trunk supports configuring default values for any Jira field on a per-issue-type basis. Users can also override those defaults when creating a ticket.
### Configuring custom fields
In the Jira integration settings (**Settings** → **Repositories** → **\[your repository]** → **Ticketing**), select an issue type. Trunk fetches all available fields for that issue type from the Jira API and displays inputs for each supported field.
For each field, you can:
* Set a default value that pre-fills the field when a ticket is created
* Check **Require user to fill at creation** to leave the field blank in settings and prompt the user to fill it in the create ticket modal instead
Trunk automatically detects required fields (as marked by your Jira project) and shows a validation error if no default is set and the field is not marked for user input.
Fields are rendered using an appropriate input type based on the Jira field schema:
| Jira schema | Input type |
| -------------------------------- | ----------------------------------------- |
| `string` | Text input |
| `number` | Number input |
| `option` | Searchable dropdown |
| `user` | User picker dropdown |
| `array` of `string` | Chip input (comma or Enter to add values) |
| `text` / `string` with text hint | Text input |
The `reporter` field is treated as optional even when Jira marks it as required. Jira automatically assigns the API token owner as reporter if the field is not specified.
The following fields are always excluded from the custom field configuration because they are managed elsewhere in the ticket creation flow:
`summary`, `description`, `project`, `issuetype`, `attachment`, `issuelinks`, `parent`
### Overriding defaults at ticket creation
When creating a ticket from the Flaky Tests dashboard, the create ticket modal shows inputs for any field that has a configured default or is marked for user input. Users can edit pre-filled defaults before submitting.