# Cursor (IDE)
### One-click setup
Use the "Add to Cursor" action to add the Trunk MCP server:
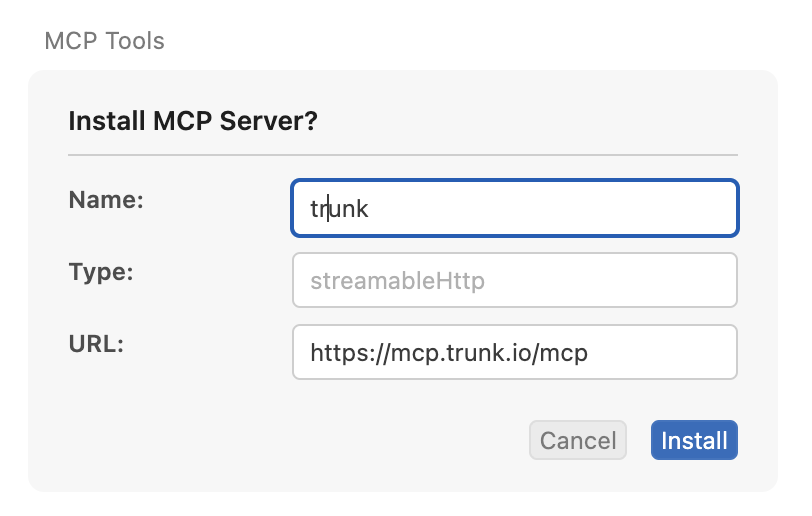
Once clicked, follow instructions to open the MCP configuration in Cursor. A new settings window to confirm the installation of the MCP server will be shown. Click on "Install" to proceed.
### Alternative: Update MCP configuration
Add the following [configuration](https://docs.cursor.com/en/context/mcp#model-context-protocol-mcp) to your project's `.cursor/mcp.json` file. If you want to enable it only for yourself, add it to `~/.cursor/mcp.json` instead.
```json
{
"mcpServers": {
"trunk": {
"url": "https://mcp.trunk.io/mcp"
}
}
}
```
### Authentication
After the MCP server was added to Cursor, users need to authorize Cursor to communicate with the server. Follow these steps to complete auth.
**Step 1: Open MCP Settings**
Run `CMD+Shift+P` to open the command palette and choose `View: Open MCP Settings`
**Step 2: Enable the Trunk MCP server**
A "Needs authentication" status will be shown:
**Step 3: Login & authorize**
A new webpage will be opened. Login with your Trunk account and follow instructions to authorize Cursor to communicate with the MCP server.
**Step 4: Confirm**
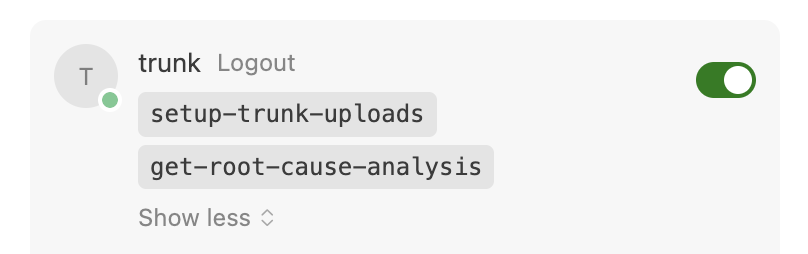
Follow instructions to get back to Cursor. With auth completed, Cursor will be able to fetch the tools exposed by Trunk's MCP server:
---
# Agent Instructions: Querying This Documentation
If you need additional information that is not directly available in this page, you can query the documentation dynamically by asking a question.
Perform an HTTP GET request on the current page URL with the `ask` query parameter:
```
GET https://docs.trunk.io/flaky-tests/use-mcp-server/configuration/cursor-ide.md?ask=
```
The question should be specific, self-contained, and written in natural language.
The response will contain a direct answer to the question and relevant excerpts and sources from the documentation.
Use this mechanism when the answer is not explicitly present in the current page, you need clarification or additional context, or you want to retrieve related documentation sections.