How It Works
The monitor continuously scans your test runs looking for commits where a test has both a failure and a success. When it finds one, the monitor activates on that test and runs its configured action: by default, the test is flagged as flaky. Once active, the monitor stays active on the test until no pass-on-retry behavior has been observed for a configurable recovery period. This prevents tests from bouncing between flaky and healthy if they only fail intermittently.
A fail then pass on the same commit flags the test flaky; 7 clean days then resolve it to healthy.
Example
Your CI retries failed tests automatically. On commitabc123:
test_loginfails on the first attempttest_loginpasses on retry
test_login had both a failure and success on the same commit and flags it as flaky.
Seven days later (assuming default settings), if test_login hasn’t exhibited any more retry behavior, the monitor resolves and the test returns to healthy.
Configuration
Multiple monitors per repository
You can create more than one pass-on-retry monitor for the same repository. Each monitor runs independently with its own settings, so you can apply different recovery periods, branch scopes, or actions to different parts of your test suite. A common pattern is to run one monitor scoped to stable branches (likemain) with a shorter recovery period for fast feedback, and a second monitor scoped to release/* branches with a longer recovery period for builds where intermittent failures are more expensive to re-investigate.
To add a monitor, navigate to Settings in the Trunk web app, open the repository, open the Monitors tab, and click Add monitor. Each monitor you create appears as a separate row in the monitors table and can be individually enabled, disabled, or deleted.
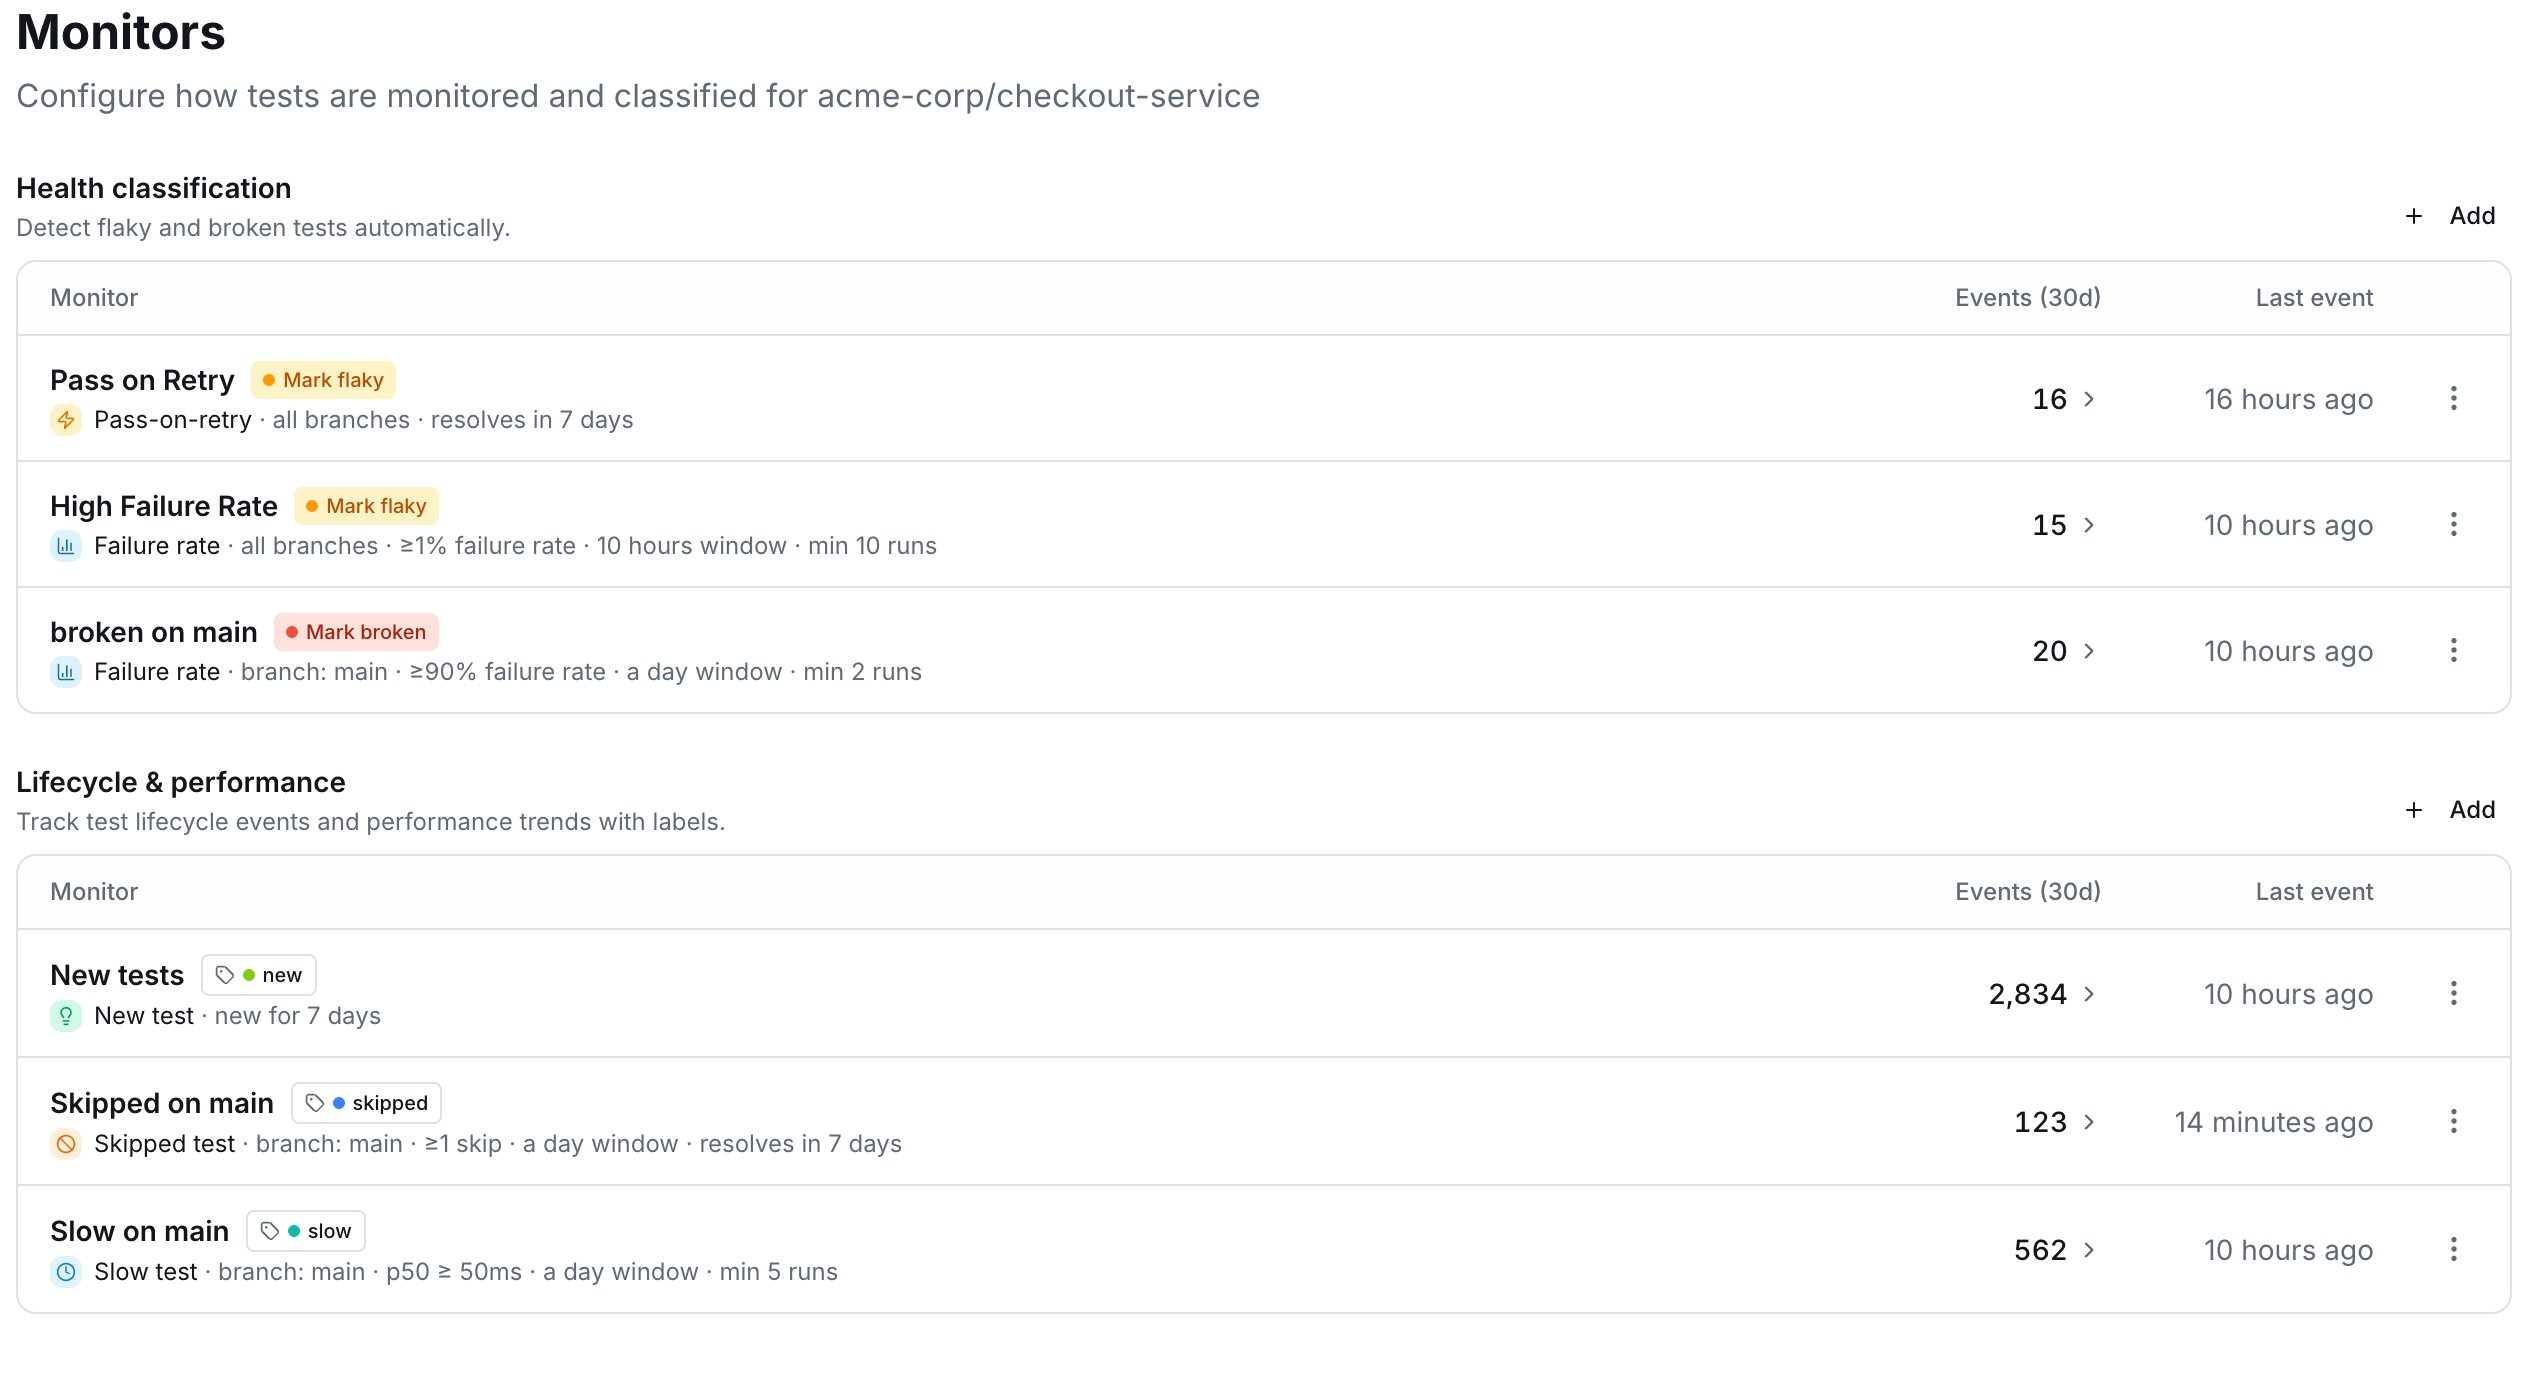
The Monitors tab lists each monitor as its own row, grouped into Health classification and Lifecycle & performance. Add Monitor creates an additional monitor in the same repository.
What Recovery Days Controls
A shorter recovery period (e.g., 1 to 3 days) returns tests to healthy quickly, which is useful if you fix flaky tests promptly and want fast feedback. A longer recovery period (e.g., 10 to 15 days) is more conservative. It keeps tests flagged longer to account for flaky behavior that only surfaces occasionally.Branch Scope
Use the Branch scope setting to restrict the monitor to a specific set of branches. This is useful when PR branches generate too much noise. CI often retries tests on pull request branches automatically; if those retries aren’t meaningful signals for your team, you can limit detection to stable branches likemain.
Branch scope uses the same glob syntax as failure rate monitor branch patterns and accepts up to 10 patterns. Type a pattern and press Enter or comma to add it as a chip. For example:
main: only stable branch runsmainandrelease/*: stable plus release branches*(default): all branches
Minimum POR Count
By default, a single commit where a test fails and then passes on retry is enough to activate the monitor. A minimum of 1 means: as soon as one commit shows the pattern, the test is flagged. Raising the minimum (for example, to 2 or 3) requires the same test to show that pattern on multiple distinct commits within the detection window before the monitor activates. This reduces false positives in environments where CI retries most failures automatically, producing one-off retry events for otherwise reliable tests. Set a higher minimum when your retry rate is high enough that a single commit’s retry event is not a reliable flakiness signal.Action
You pick the action at creation and can switch it at any time.- Classify test status (default) — flags the test as flaky while the monitor is active and restores it to healthy when the monitor resolves. Pass-on-retry only classifies as flaky; there is no broken option.
- Apply labels — adds the configured labels to the test while the monitor is active. The test’s health status is not changed by this monitor. See Automatic labeling from monitors.