Prerequisites
- A Trunk account and organization
- GitHub admin on the target repository (required to install the GitHub App and edit branch protection)
- The repository’s default branch identified, plus the ability to modify its branch protection rules or rulesets
Step 1: Install the GitHub App and create a Queue
The Trunk GitHub App is required for Merge Queue to function. It grants Trunk Merge Queue the necessary permissions to create test branches, read CI results, and merge PRs in your repository. View detailed permissions and what Trunk uses them for.The Trunk GitHub app can be added and removed from repositories within your org as needed.
- Sign in to app.trunk.io and navigate to the Merge Queue tab. (First-time users will create an organization before accessing Merge Queue.)
- Click the Create New Queue button.
If the GitHub App is already installed, step 3 will be skipped automatically.
- If the Trunk GitHub App is not already installed, you’ll be prompted to install it.
You must be a GitHub admin to complete the following steps. If you are not a GitHub admin in your organization, navigate to Settings → Organization → Team to invite a GitHub admin to your Trunk organization so they can complete the following.The GitHub App installation must be initiated from the Trunk web app to properly associate your Trunk organization with the GitHub App. If you have previously installed the Trunk GitHub App directly through GitHub, you’ll need to uninstall it first and then reinstall it by starting the installation process from the Trunk web app as described below.
- Click Install GitHub App and follow the installation flow:
- Select whether to install on all repositories or only specific ones
- Review and approve the required permissions
- Complete the installation
- After the GitHub App installation is complete, you’ll be returned to the Trunk dashboard.
- In the Merge Queue tab click the “New Queue” button.
- Select a repository from the dropdown and enter the target branch to merge into. Click Create Queue.
.png?fit=max&auto=format&n=_uqom5T5LPXKKAze&q=85&s=9daf7e437bb3bf355cdd10375b399c79)
Step 2: Configure Branch Protection
The merge queue needs specific GitHub permissions to function. Follow the Branch Protection & Required Status Checks guide to:- Configure push restrictions - Allow the
trunk-iobot to push to your protected branch - Disable “Require branches to be up to date before merging.” - This setting is one of the most common sources of confusion. Many teams enable it to keep their branch green, but it conflicts with how merge queues work. If this is on, PRs will often sit in the “Queued” state forever because GitHub blocks Trunk from updating them.
- Exclude Trunk’s temporary branches - Make sure
trunk-temp/**/*andtrunk-merge/**/*branches are not protected by any rulesets. They are created and cleaned up automatically by the queue.
Without proper branch protection configuration, the merge queue will not
work. You may see errors like “Permission denied on
trunk-merge/**/*
branch” or PRs will remain stuck in “Queued” state.- Restrict who can push to your protected branch (e.g., main).
- Then allow the Trunk GitHub App as the only actor permitted to push to that branch.
Step 3: Test your setup
Now that branch protection is configured, test that the merge queue works correctly:- Create a test pull request in your repository
- Submit it to the merge queue using one of these methods:
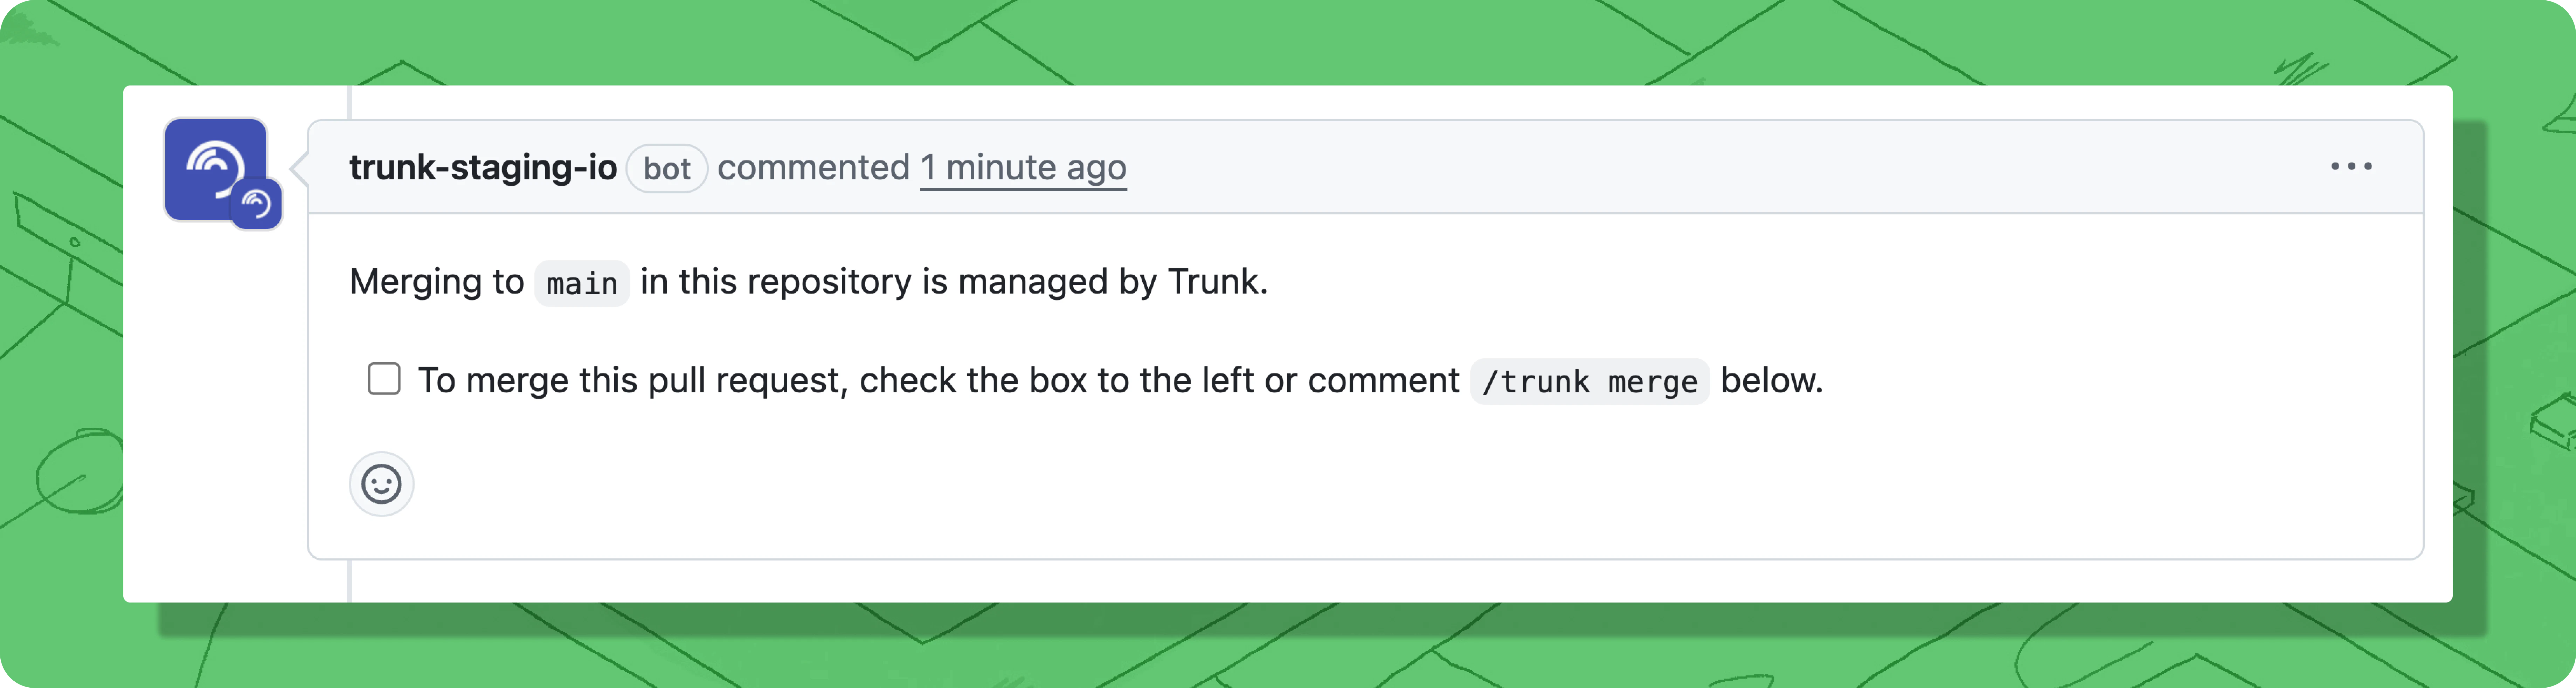
- Checking the box in the Trunk bot comment on your PR, or
- Commenting
/trunk mergeon the pull request
You can submit a PR to the merge queue at any time, even before CI checks pass
or code review is complete. The PR will remain in “Queued” state until all
required conditions are met, then automatically begin testing.
- You can check the PR in the Trunk Dashboard - once your PR passes all required checks, it will move from ‘Queued’ to ‘Testing’. The merge queue will then test it again with changes ahead of it in the queue. When those tests pass, it will automatically merge.
Visit Trunk Support for additional
assistance or to contact the support team.
- Check the status comments for the PR in the Trunk Dashboard to see what it’s waiting for
- Stuck in “Queued”: Usually means branch protection rules haven’t passed (missing required status checks or code review) or there are merge conflicts. If the status looks correct but the PR still won’t enter the queue, try removing and re-adding by commenting
/trunk mergeagain on the PR. - Fails when attempting to merge: Check that the merge method your queue is configured to use (squash by default) is enabled for your repository in GitHub settings (
Settings > General). - “Permission denied” errors: Review the Branch Protection guide to make sure
trunk-temp/*andtrunk-merge/*branches aren’t protected by wildcard rules like*/*. - Status checks not running: Verify your CI is configured to run on draft PRs (or
trunk-merge/**branches if using push-triggered mode). See the Branch Protection guide for details.